Note: Each one of the UI's "Admin, Supply and Demand" require unique email addresses to sign-up with .Direct demand customers signup.jpg 21.18 KBAfter complete the form, they will receive a message saying that their account is awaiting approval:message awaiting approval-.jpg 12.59 KB
At this point the demand customer has submitted their information and is in the waiting queue to use your system to buy impressions for their digital media campaigns. The admin will receive an email notifying them that a new demand customer signed up and is awaiting approval
Admin must Approve Demand Customers
After a Demand Customer is approved, they can begin to set up their ad campaigns and banners to get start getting display impressions.
Setting up a Private ExchangeSetting up a Private Exchange
All demand customers get their own private custom ad exchange which they can set up with their own publishers and set their own margins and or rev-share on.
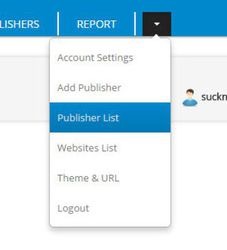
To sign up publishers to your private exchange log in and click the "Add Publisher" link in the menuadd pub.jpg 15.86 KB
Fill out all the publisher's information, then click on the create account button. The publisher will be created if no errors exist.add new private exchange.jpg 22.94 KB Now use the Publishers list menu item to view your private exchange's publisherspublist.jpg 6.58 KB
The publishers for only your private exchange are listed on that page. The main difference between a publisher added in your private exchange and the ones that sign up on the home page is that these publishers belong to the demand customer, and their inventory will be exclusive to the demand insertion orders of the private exchange customer. There is an option to allow private exchange publishers' inventory to be purchased exchange-wide, but it's not enabled by default. You can enable it by checking the "Platform Connection" box in the domain edit page.
The other difference between private exchange publishers and the public publishers that sign up on the home page is that their information is managed by the demand customer in the role of private exchange domain admin.
When a private exchange demand customer creates a vanity domain and color scheme those publishers can be given their username/email and password along with the URL to the vanity domain so they really get the impression they are on a different custom ad exchange.private exchange list.jpg 22.73 KB
Setup a White Label & Vanity Domain for demand customers
I'm sure everybody's aware that AppNexus white labels their dashboard for demand customers (partial list ) with "Custom Exchanges". Now your Demand customers have the same option in your tech as a demand customer, choose the Theme & URL menu option from the top right menu.theme option.jpg 10.6 KB
Now select the domain you want to use for your private exchange, optionally upload a logo to use on the login page and in the top left corner of the layout, and choose the colors in your theme.
Once you are happy with your choices, scroll all the way down and click the "Update Domain and Theme" button.
You will need to create a DNS "A RECORD" to the main IP address for the server.
After you have completed this and the DNS has propogated (usually in a few minutes), you can give your publishers the URL to your private exchange, and they can log in thinking that you have your own ad exchange. <-- Similarly to AppNexus, Zedo, ePOM, ect...SET VANITY .jpg 63.49 KB
Demand Insertion Order Creation Process Add New Insertion Order
To Add new line items, you must first create a new insertion order.
Fill out the items on the left side about the order. Then you must select some inventory which will fill the insertion order.
The Choices are:
Private Exchange inventory. Click the Add button to open a light box and choose some inventory. These are websites from publishers that you added in your private exchange. The impressions here are exclusive to your own private, custom ad exchange unless you selected the "Platform Connection" option in the website details edit page.
Platform Connection inventory. Click the Add button to open a light box and choose some inventory. This inventory is from the private exchange publishers of other demand customers with their own private exchange who have enabled Platform Connection.
RTB Publisher inventory. Click the Add button to open a light box and choose some inventory. This inventory is from OpenRTB partners which are sending their remote exchange's inventory to sell. If you've ever used SiteScout, it would be similar to that experience. In this scenario, you are using ____ to proxy bid on inventory from other remote Ad Exchanges just as you would on SiteScout.
Please note: that none of the inventory selections here are applied to the actual insertion order. At this stage you are choosing default inventory which will be shown in your insertion order's line items. Only the inventory selections from the line items are used in the actual filling of the insertion order.
Please note: If you just set up your ____, and you are looking for SSP or other inventory and nothing shows up. Your ____ ad server is not broken! The default date selection for SSP inventory and for Platform Connection inventory is yesterday's date. Simply open up the"Statistics Date" selection box underneath each inventory feeds selection box and choose today's date, then click the Add button again, and the inventory from the same day should show up.creat new IO.jpg 48.05 KB
Add New Line Item
To add a new line item to your insertion order for an image, banner or video ad, click on the "view line items" link in the insertion order, then the "create new line item" link.
Choose the Ad Delivery Type, and fill out the left side of the form. On the right side you will see the default inventory that you chose in the insertion order creation screen.
You may add or remove inventory from which to fill this line item.
Please note: Any inventory you choose for line items is final and will be used in production to fill the insertion order once the insertion order is promoted from staging to production
Please note: If you just set up your system and you are looking for SSP or other inventory and nothing shows up. Your server is not broken! The default date selection for SSP inventory and for Platform Connection inventory is yesterday's date. Simply open up the "Statistics Date" selection box underneath each inventory feeds selection box and choose today's date, then click the Add button again, and the inventory from the same day should show up.CREAT NEW LINE.jpg 39.47 KB
Add Banner Creatives
Normally the Demand Customer or Brand (Like Dominos Pizza's Digital Marketing firm for example) will simply ask their designer to upload the creatives (banner). Then they will add click tracking and copy/paste the ad tag into the Ad Tag text box and start their campaign. In this system there is an AJAX drag and drop uploader for creatives that you can use. Simply select the new image ad delivery type then drag creative into the box or click the box to open a file dialog on your browser.EDIT IO.jpg 47 KB
Note that ad networks often times take ad tag code from the publisher dashboards of ad exchanges like AppNexus, Lijit, Zedo, Pubmatic and others and put it in your ____ ad server. They would do this because the other ad exchange would sell CPM space in that zone for a cheaper rate than your ____ sells it for ( in order to make a profit from arbitrage ). It's up to the admin to determine whether to let that go or whether to moderate the Publisher.
Set Delivery Filters on your Ad Campaign Banner
Now that you have created a banner for your ad campaign, you can optionally target it to the verticals and geographic regions you want to buy traffic from by using a delivery filter.DELIVERY FILTERS.png 168.92 KB
Note that only some of these delivery filters work with OpenRTB due to the limitations of the 2.2 specification. Other filters will work with various proprietary RTB specifications.
The list of filters that currently work with OpenRTB are:
Vertical
Geo Country
Geo State
Geo City
Ad Position Min Left
Ad Position Max Left
Ad Position Min Top
Ad Position Max Top
Fold Position
Min Screen Resolution Width
Max Screen Resolution Width
Min Screen Resolution Height
Max Screen Resolution Height
Set Domain Exclusions on your Insertion Order Line Item
Use this feature to exclude publishers you don't want from your publisher poolDOMAIN BLACK LIST.jpg 23.77 KB
Sites added to the exclusion list will not receive any impressions from the associated ad campaign banners
Set Exclusive Inclusions on your Insertion Order Line Item
Use this feature to exclusively include publishers you do want in your publisher poolEXCLUSIVE LIST .jpg 25.93 KBSites added to the exclusive inclusion list will only receive impressions from the associated ad campaign banners.
If at least one entry exists as an exclusive inclusion list linked to an ad campaign banner, no other publishers except the publishers on the exclusive inclusion list will receive impressions from the associated ad campaign banner.
This can be used to create a short list of RTB publishers to target a demand ad campaign. Say your SSP gives you a list of 2,000 publishers and you only want to bid on 15 of them in the RTB bid stream, you would put the 15 publishers' domains on the exclusive inclusion list and all other publishers sent by the SSP are ignored for that ad campaign banner. This not only works for impressions coming from your SSPs using RTB, but will also work on the publishers signed up to your server who have accounts in the publisher dashboard.
Versioned Changes on Demand Customer Campaigns
By Default changes made to a demand ad campaign do not immediately go live. Any insertion order you create or edit is immediately put in the "staging" environment, where you can continue to edit them without effecting the "production" or "live" version of the insertion order that is currently running. Once you promote a staging insertion order to production, the insertion order will start to fill on publishers' inventory and you will be billed for the impressions that you get as a result of the changes. You can optionally click on the "RESET STAGING" link to cancel all changes on the insertion order and restore it to it's prior state on staging.CREATE IO.jpg 66.79 KBSetting the CPM Markup Rate on Private Exchange Publishers
What is the Publisher mark-up rate?
Publishers that you sign up to your Private Exchange do so with the intention of making money from the ad space on their websites. In return they must pay a fee. That fee is a percentage of the profits from their ad sales. That is the publisher mark-up rate, otherwise known as rev-share or revenue sharing.
The publisher mark-up rate you set persists through Private Exchange insertion order fills on your own insertion orders as well as Platform Connect insertion order fills by other demand customers using the Exchange Server.
There are two different ways to set the publisher mark-up rate in
The default rate is set by the Exchange admin.
The first way you can assign a mark-up rate is to assign a default mark-up rate that only applies to a publisher. To assign this default mark-up rate for a single publisher, sign in as the publisher from the private exchange publisher dashboard, and change the rate in the box above the publisher website list and click on the Change Publisher Markup button.SET DEFAULT RATE .jpg 64.87 KBThe second way you can assign a mark-up rate is to assign a default mark-up rate that only applies to a publisher's website. To assign this default mark-up rate, sign in as the publisher from the Admin dashboard, and change the rate in the box in the row for the website and click on the Update Markup button.SET MARKUP FOR EACH.jpg 67.4 KB